How to Repair Bleeding Knots in Exterior Timber Before Painting
By MI Decor Painting & Decorating
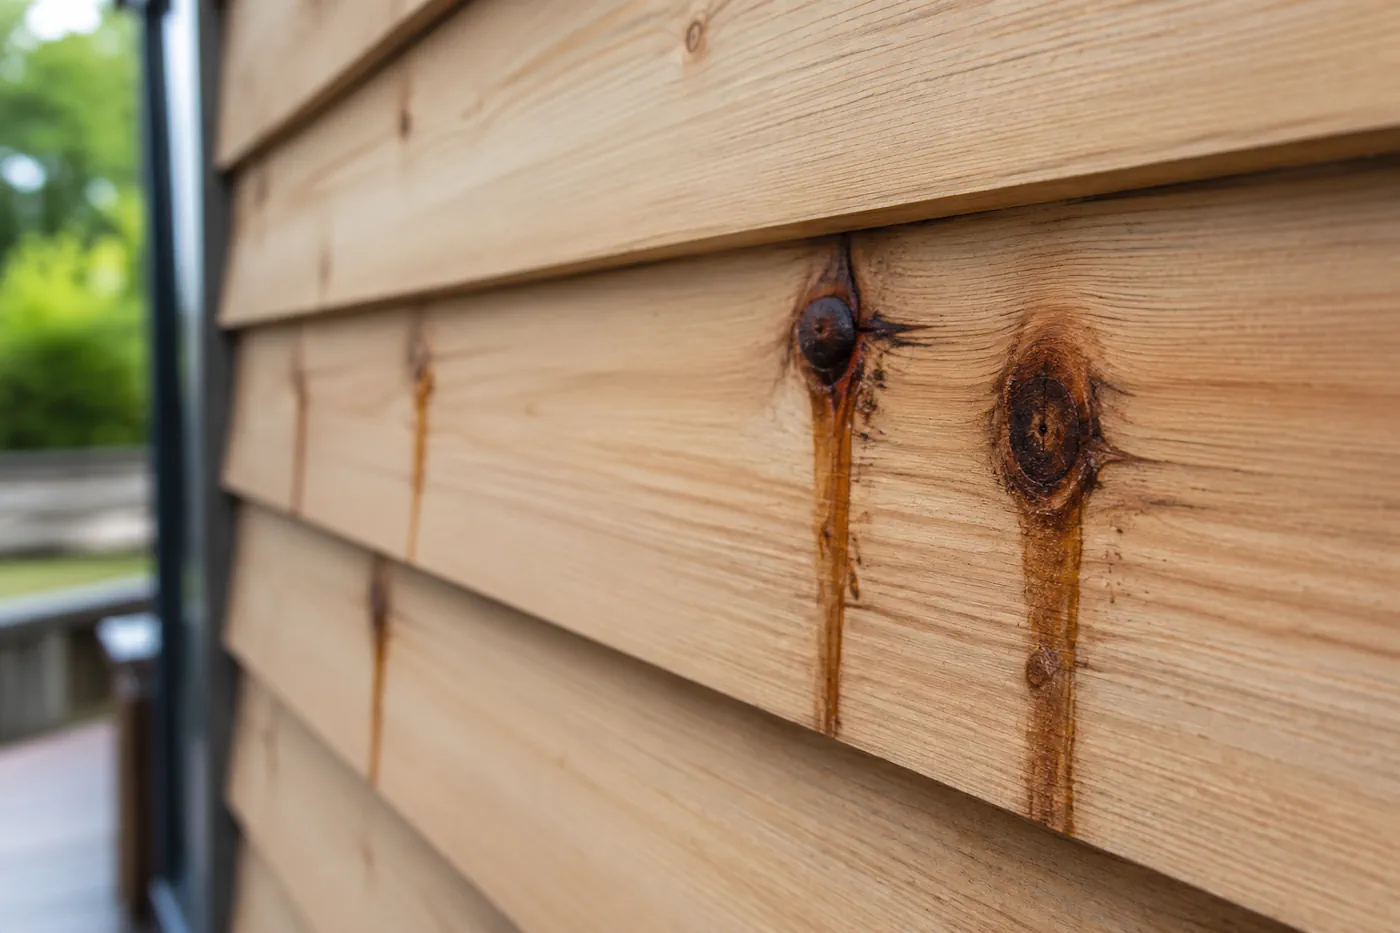
One of the most common problems encountered when decorating exterior timber is knot bleed. It can appear in two ways: as brown staining showing through the paint system, or as a sticky, amber-coloured resin seeping from the knot itself. The two look related, but they are not the same defect, and understanding the difference between them is critical. It determines which repair method you use, and it is usually the difference between a finish that lasts and one that fails in the same place year after year.
The sections below set out both scenarios, the symptoms to look for, and the recommended repair procedure for each.
System 1 – Repairing Knots with Staining but No Active Resin Bleed
This is the more common and more forgiving of the two problems. The knot has discoloured the paint, but the resin is no longer moving, so the repair is about cleaning the area back and sealing it correctly.
Symptoms
- Brown or yellow staining is visible through the paint.
- No sticky residue on the surface.
- The knot appears dry and stable.
- The previous paint coating may have discoloured around the knot.
Recommended Repair Procedure
Step 1 – Surface Preparation
- Scrape away any loose or flaking paint.
- Sand the affected knot area back to sound, bare timber.
- Remove all dust and contamination before continuing.
Step 2 – Cleaning
- Clean the knot with methylated spirits to lift any surface resin.
- Allow the timber to dry thoroughly before sealing.
Step 3 – Sealing
- Apply 2–3 coats of a shellac-based primer such as Zinsser B-I-N.
- Allow each coat to dry fully before applying the next.
- Lightly abrade between coats if required.
Step 4 – Priming
- Apply Dulux Weathershield Undercoat.
Step 5 – Finishing
- Apply Dulux Weathershield Gloss or the chosen exterior topcoat.
Expected Result
This system is normally sufficient where staining is present, but resin is not actively migrating from the timber. With the knot properly sealed beneath shellac primer, the discolouration is held back, and the finish coats can perform as intended.
System 2 – Repairing Knots with Active Amber Resin Bleed
This is the one that catches people out. Where resin is actively flowing, sealing over it only delays the failure — the heat returns, the resin moves again, and it pushes back through the coating. The reliable approach is to remove the source of the resin rather than attempt to trap it beneath the paint.
Symptoms
- Amber or honey-coloured liquid visible on the surface.
- A sticky or tacky area around the knot.
- Resin is visibly flowing from the knot.
- Paint that repeatedly fails in the same location.
Recommended Repair Procedure
Step 1 – Remove Active Resin
- Scrape away all visible resin.
- Excavate the knot pocket using a sharp chisel, drill or router.
- Remove approximately 5–10 mm of contaminated timber where necessary.
- Continue until sound, dry timber is reached.
Step 2 – Clean Thoroughly
- Wash the exposed area with methylated spirits.
- Remove all remaining resin contamination, as anything left behind can bleed again.
- Allow the timber to dry completely.
Step 3 – Structural Repair
- Fill the excavated area using a high-quality two-part epoxy wood repair system.
- Shape and sand the repair flush with the surrounding timber once cured.
Step 4 – Seal the Repair
- Apply 2–3 coats of a shellac-based primer such as Zinsser B-I-N.
- Extend the primer slightly beyond the repaired area onto the surrounding sound timber.
Step 5 – Prime
- Apply Dulux Weathershield Undercoat.
Step 6 – Finish
- Apply Dulux Weathershield Gloss.
Expected Result
By removing the resin source rather than attempting to trap it beneath paint, this system offers the highest probability of long-term success. This is particularly true on south-facing elevations and on timber exposed to strong, direct sunlight, where the heat driving the resin is at its greatest.
Professional Recommendation
Where a knot is simply stained, sealing with multiple coats of shellac primer is usually sufficient.
Where a knot is actively bleeding amber resin, the preferred professional repair is:
Excavate → Clean → Epoxy Repair → Shellac Primer → Undercoat → Gloss
This method removes the source of the failure rather than covering it and provides the most durable repair for exterior timber joinery and porch structures.
At MI Decor, careful diagnosis of timber defects before painting helps ensure a longer-lasting finish and reduces the risk of premature coating failure.